
Every TCF Canada essay and every spoken monologue has the same scaffolding underneath: how to open, how to move on to the second argument, how to close. That scaffolding isn't worth reinventing each time. Learn it before the exam, fill it in on the day, and spend the time and attention you save on the content that is actually being graded.
The HiTCF structure skeleton is that scaffolding. There is one for Writing Tâche 1, Tâche 2 and Tâche 3 and one for Speaking Tâche 3. Each paragraph opener is written out for you, and the parts you fill in yourself are marked in purple.
How it differs from an ordinary template
Writing templates that circulate online are often memorised word for word by thousands of people. A HiTCF skeleton is drawn for your account: every position has several phrasings, and the combination you get is not the one anyone else gets. Once drawn it stays put. It's yours, and any line you swap or write yourself is never touched by the system.
The lines are also filtered by your target level, so someone aiming for B2 won't be handed phrasing above that level.
Where to find it
On the tests page, switch to Writing or Speaking and you'll see My structure skeleton (My speaking skeleton for speaking):
- Writing Tâche 1 skeleton
- Writing Tâche 2 skeleton
- Writing Tâche 3 skeleton
- Speaking Tâche 3 skeleton
You need to be signed in: the skeleton belongs to your account.
What's on the page
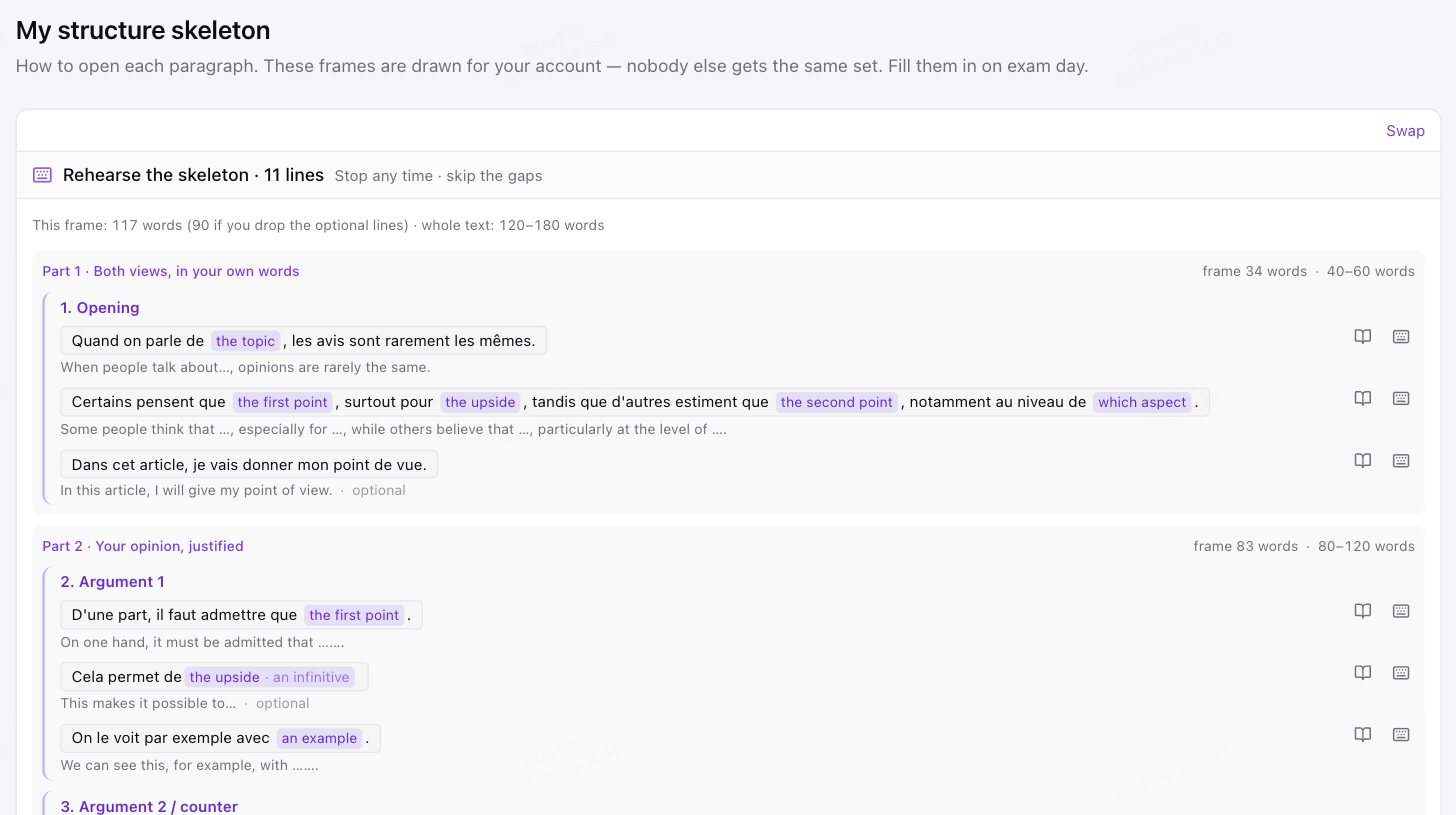
Every French line has a translation in your interface language underneath. The purple tags (such as "the topic" or "one view") are the gaps you fill in, and some say whether a noun or a verb goes there. Click any word in a line to open its word card; each line also has Sentence breakdown and Write this line from memory. Lines marked optional can be dropped when you're short on words.
The top of the page tells you how many words the skeleton takes, how few it can shrink to, and the word range for the whole text, so you know how much room is left for content.
Writing Tâche 1: decide who reads it first
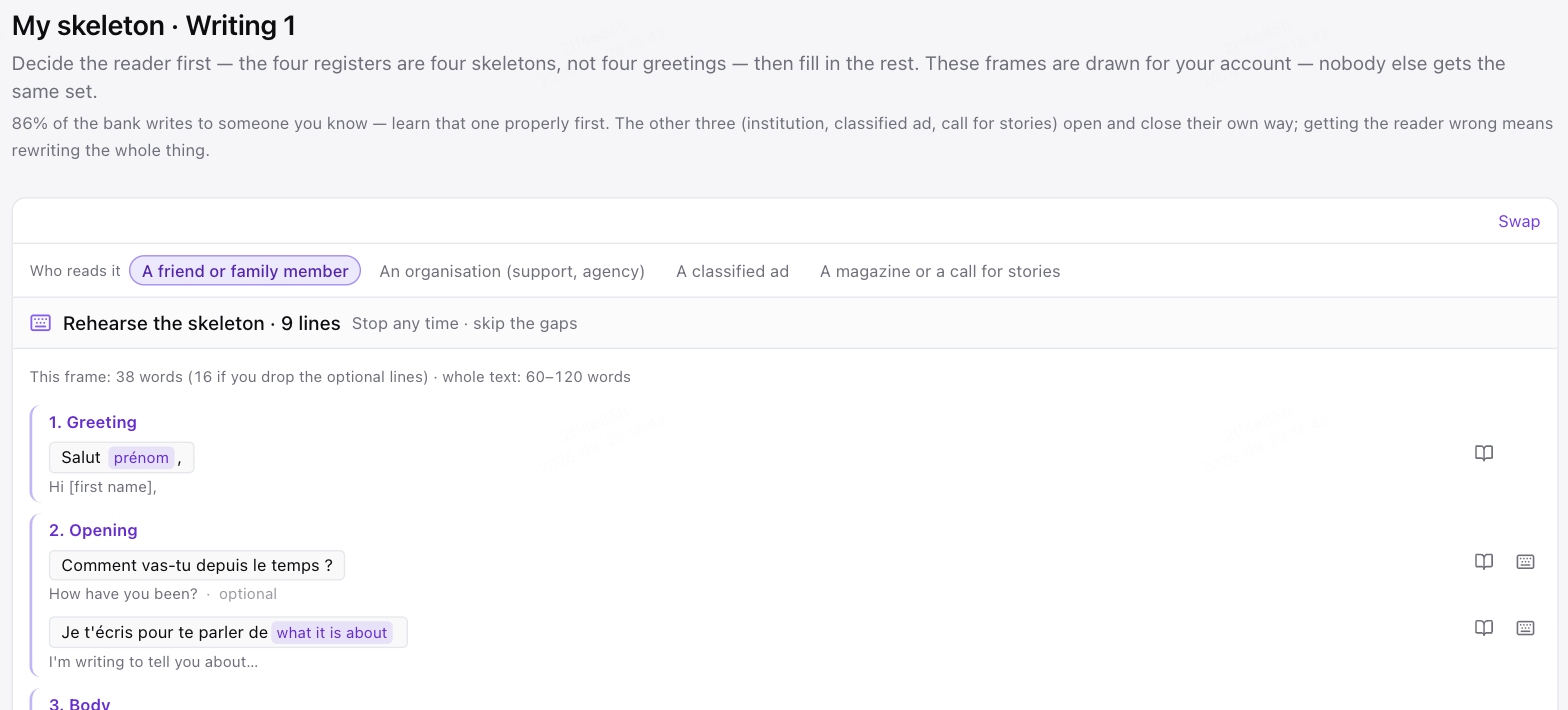
The Writing 1 skeleton comes in four sets depending on who reads it: a friend or family member, an organisation (support, agency), a classified ad, or a magazine or a call for stories. It's more than a different greeting. A message to a friend uses tu throughout, a letter to an organisation is written differently from the first line to the last, and a classified ad has no greeting at all.
Pick one under Who reads it. Most prompts in the question bank are written to someone you know, so learn that set properly first, then add the openings and closings of the other three.
Writing Tâche 2: two formats and several task types
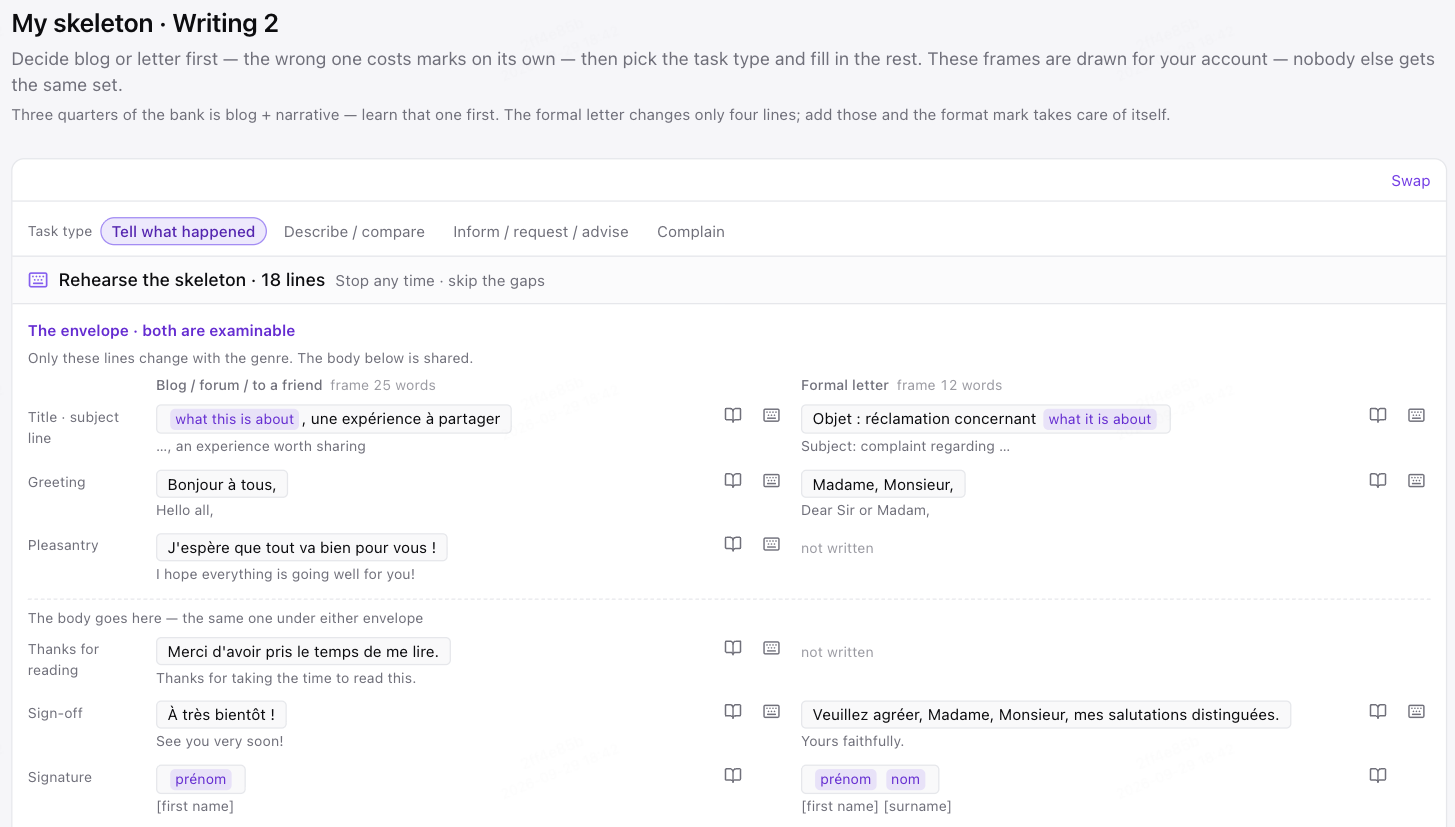
In Writing 2 you first decide whether it's a blog / forum post or a formal letter. The wrong format costs marks on its own. The page sets the two "envelopes" side by side: title, greeting, pleasantry, thanks, sign-off and signature change with the genre, while the body is shared.
The body then depends on the task type: tell what happened, describe / compare, inform / request / advise, or complain. Whichever you pick, the body below switches to that set, and so does your rehearsal queue. At the bottom are three worked samples showing what the skeleton reads like once it's filled in.
Writing Tâche 3: two parts, two sets of marks
The Writing 3 skeleton follows the exam's two parts:
- Part one: present the two views in your own words (40–60 words)
- Part two: give and argue your own view (80–120 words)
These are split into opening, argument 1, argument 2 / counter, your stance and conclusion, plus a "stance first" section that starts empty and can be added if you want it. The page also has a list of connectors grouped by use (opening, adding, contrast, cause, consequence, example, opinion, concluding) that you can flip through as flashcards or drill on their own.
Speaking Tâche 3: a third of the time, covered
In Speaking 3, 4 minutes 30 seconds is the floor, not the ceiling. This skeleton is about 190 words, roughly 100 seconds spoken; the rest of the time is yours to fill. Every line has Listen to this line, and you can shadow it for a score or write it from memory.
Swap in lines that suit you
Click Swap at the top right and the skeleton becomes editable. Click any line to:
- Pick another phrasing: each position has several options, all filtered by your target level. Connectors that come in pairs (such as D'une part… / D'autre part…) stay matched: swap one half and the other follows. If two lines in the same paragraph open the same way, you get an orange warning.
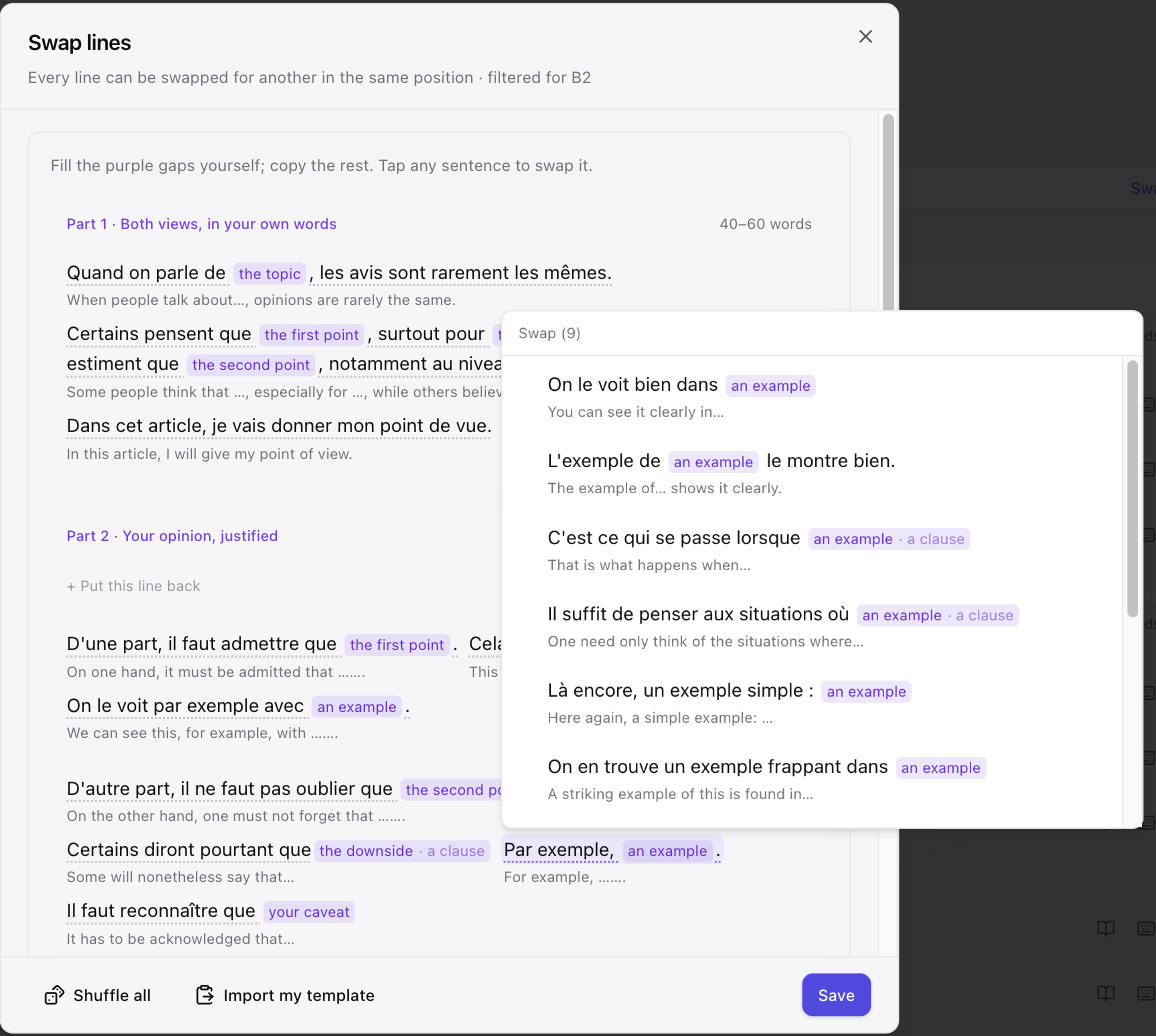
- Leave this line out: offered only where a line can be dropped, together with why it can go or what it costs. You can bring it back at any time with "+ Put this line back", and it returns as the line you had.
- Write your own: write straight in French, using
…for the parts you fill in later, or write it in your own language and click Translate to French, then check the result before saving. A translation is added automatically when you save. Each position holds up to 3 lines of your own.
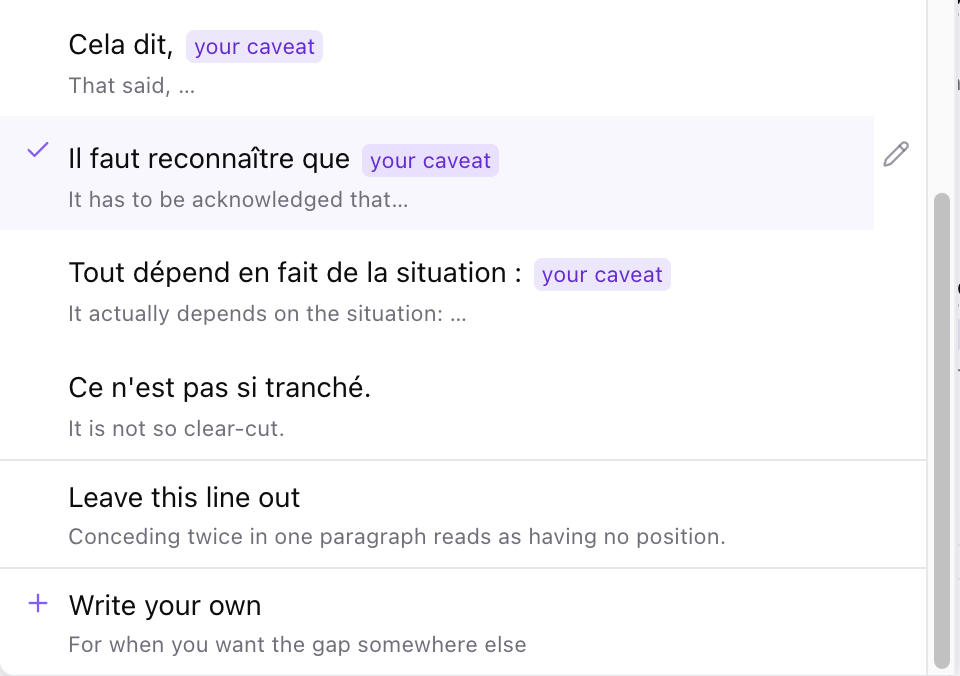
- Shuffle all: if you'd rather not pick line by line, redraw the whole set; positions you left empty stay empty.
Changes only take effect when you click Save.
Import your own template
If you already have a writing template from a teacher, or one you've built up yourself, you don't need to copy it in line by line. Under Swap, click Import my template (available for all three writing Tâches):
- Paste the whole template. Leave the gaps however you write them:
[topic],___and…are all recognised. - Click Check it. This step only compares; nothing changes yet.
- Read the result: which of your sentences go into the skeleton and which line each one replaces; which positions your template doesn't cover and will be left empty or keep their current line; which sentences have no matching position.
- If it looks right, click Import. If not, click Edit the template and adjust it.
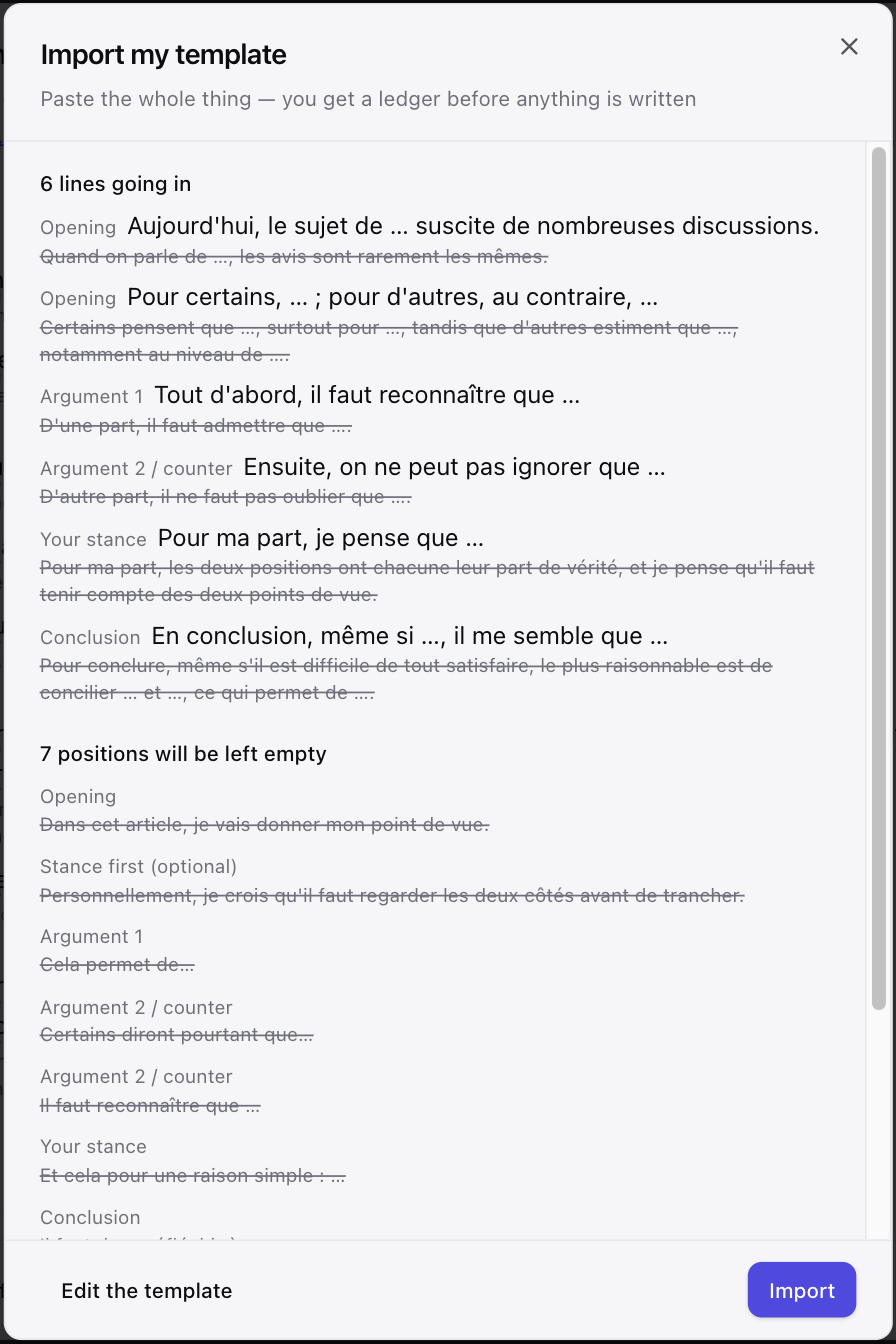
Importing does just two things: it puts each sentence in its position and marks the gaps. Not a single word of your sentences is changed. If a sentence the system returns doesn't match what you pasted, that sentence is held back instead of being quietly replaced by a rewritten version.
Learn it by heart
At the bottom of each page is Rehearse the skeleton: write it out line by line from start to finish, stop whenever you like, and ellipses are skipped. Every line is marked right or wrong, and mistakes go into your error notebook. Once you've written every line, this becomes a review of only the lines that are due. Writing and speaking progress are tracked separately.
Use it while you write
When you practise on the writing page, open the Structure panel:
- The skeleton picks the genre and task type for this prompt automatically; if it guesses wrong, change it by hand.
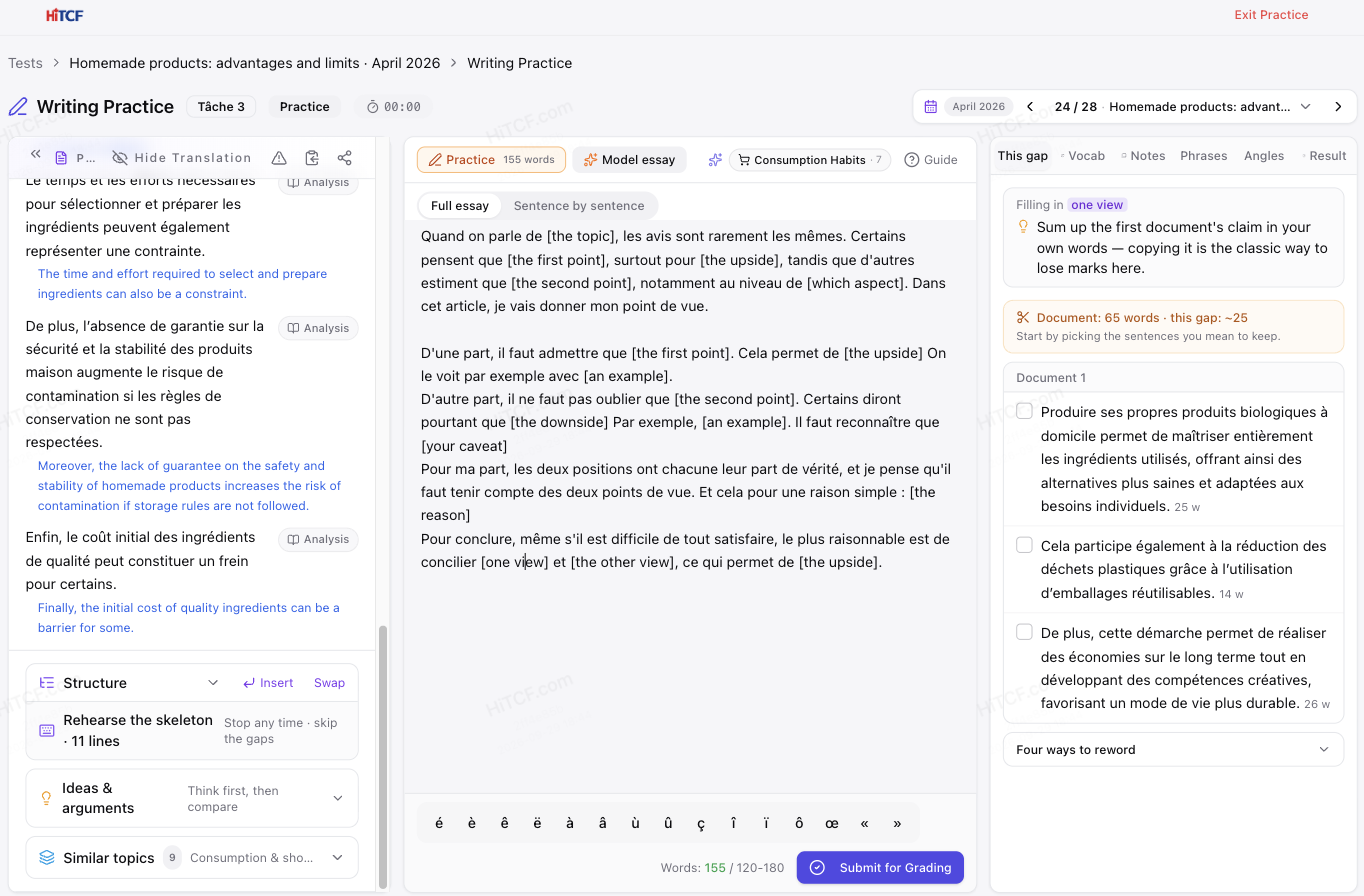
- Click Insert and the whole skeleton goes into your essay box, gaps included, shown as placeholders like
[the topic]. - You can't submit while placeholders are still unfilled, so no essay goes in with square brackets left in it.
Writing 3 gets one extra bit of help: wherever your cursor sits in a gap, the right-hand side shows where to find material for it. For the argument gaps you can click a ready-made argument to drop it in. The "one view" and "the other view" gaps only show you the original documents, with no one-click fill, because the task asks you to restate them in your own words, and copying the documents is exactly where part one loses marks.
The Speaking Tâche 3 practice page has a Use my skeleton button too: one click puts the skeleton into your script box with the cursor on the first gap.
Free and members
- Signed in: read the first two sections of each skeleton, rehearse them, and switch the Writing 1 reader and the Writing 2 task type.
- Members: the full skeleton, plus Swap, writing your own lines and importing your own template.
Once the skeleton is second nature, you won't have to think up openings, transitions and closings in the exam room, and all of your time can go into content. Start with the Tâche you're least sure of and open your structure skeleton.